
- How to Display Tax-Inclusive Prices in LatePoint
- Bundled Services
- Managing Bookings With The New Shopping Cart
- Set custom start date for the calendar on your booking form
- How to make Phone Number a required field?
- How to Show Only Services or Only Bundles in a Booking Form
- How to Set Base Fee for Group Bookings
- How to Show Custom Display Price for Bundles
- Add booking form directly on a page
- Redirect to a custom “Thank you” page after booking is complete.
- Add custom content before or after booking steps
- Customize Book Button Appearance
- Add preselected Agent, Service or Location on Book Appointment Button or Form
- How to change time slot style on the calendar?
- Custom CSS for changing colors
- Booking Form Editor
- Specify which services, agents and locations will be available on a booking form
- How to pick specific categories to be displayed on the booking form
- How to show only services from specific category
- Set custom fonts for the booking form
- How to setup Facebook Pixel
- How to Disable the Messaging Functionality in LatePoint
- How to upgrade to Version 5?
- How to Update to Version 5.1.0
- Which addons are part of a PRO bundle in version 5?
- How to deactivate my license from a website I no longer use.
- Redirect to a custom “Thank you” page after booking is complete.
- How to add a link to terms of service checkbox custom field
- Edit content of the left panel section
- How to enable self hosted Google Calendar setup?
- How does LatePoint send emails?
- How to enable debug log?
- Add to Calendar link is not working
- Getting “One of the plugins is invalid” error when installing add-ons
- Error: unexpected ‘int’, expecting function…
- Service categories not showing during booking process
- Error: Cannot read properties of null (reading: verifyBuyer)
- WordPress Users still can’t login, even when “Use WordPress users as customers” option is checked
- New service is being created when trying to update existing service.
- Auto-sync of events from Google Calendar is not working
Displaying Events and Registration Buttons
Once your events are set up, you can display them anywhere on your website using two shortcodes: one for a browsable list of events, and one for a standalone registration button tied to a single event.
The Events List Shortcode
You can display your published events using:
[latepoint_events_list]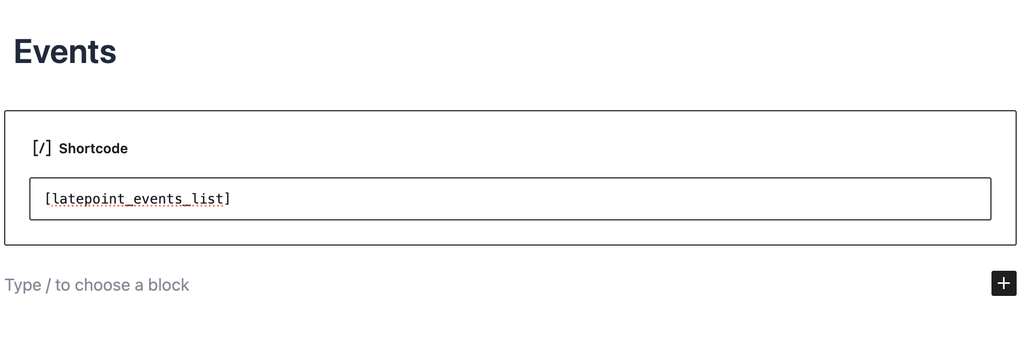
Add this shortcode to the WordPress page where you want your events to appear. The list displays your published events and allows customers to start the registration process directly from it.
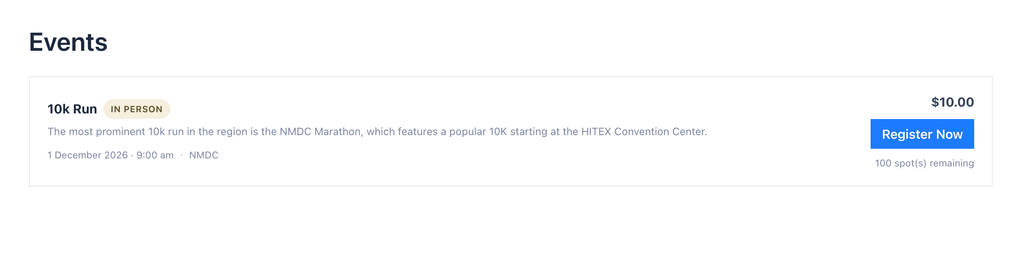
You can customize the Events List shortcode using the following attributes:
| Attribute | Description | Available Options / Example |
|---|---|---|
limit | Controls how many events are displayed. | Default: 20. Example: [latepoint_events_list limit="10"] |
category_id | Displays events from a specific Event Category. | Replace with your Event Category ID. Example: [latepoint_events_list category_id="5"] |
image_mode | Controls how the event image/date area is displayed. | thumbnail, date, or none. Example: [latepoint_events_list image_mode="thumbnail"] |
show_seats_left | Controls whether the remaining event capacity is displayed. | yes or no. Example: [latepoint_events_list show_seats_left="yes"] |
The Event Registration Button Shortcode
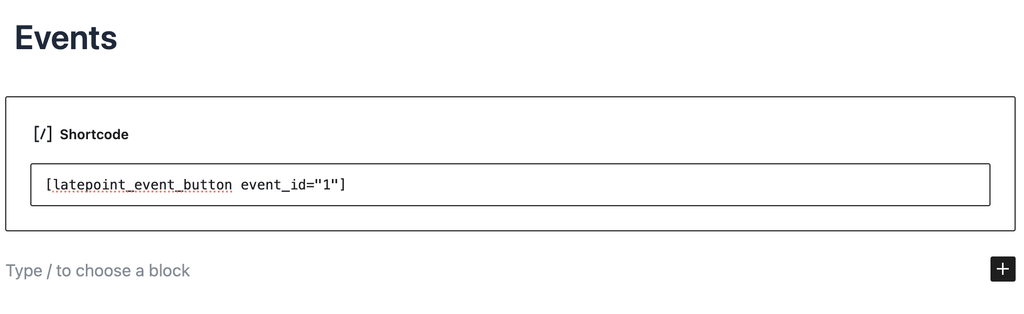
You can also place a registration button for one specific event anywhere on your website, independent of the full events list:
[latepoint_event_button event_id="1"]The button automatically changes depending on the event’s availability. For example:
- Register
- Sold Out
- Registration Closed

Beyond event_id, the button supports a full set of styling attributes so it can be matched to your site’s design without custom CSS:
| Attribute | Description |
|---|---|
event_id | The ID of the event this button registers for. Required. |
caption | The text shown on the button. Defaults to “Register.” |
align | Alignment of the button. |
bg_color | Background color of the button. |
text_color | Text color of the button. |
font_size | Font size of the button text. |
border | Border style for the button. |
border_radius | Corner radius of the button. |
margin | Margin around the button. |
padding | Padding inside the button. |
css | Additional custom CSS applied to the button. |
classname | A custom CSS class added to the button wrapper. |
btn_classes | A custom CSS class added to the button element itself. |
btn_wrapper_classes | A custom CSS class added to the outer wrapper around the button. |
Example with a few styling attributes combined:
[latepoint_event_button event_id="1" caption="Save Your Spot" bg_color="#2c7a4b" border_radius="8px"]What Happens When a Customer Clicks Register
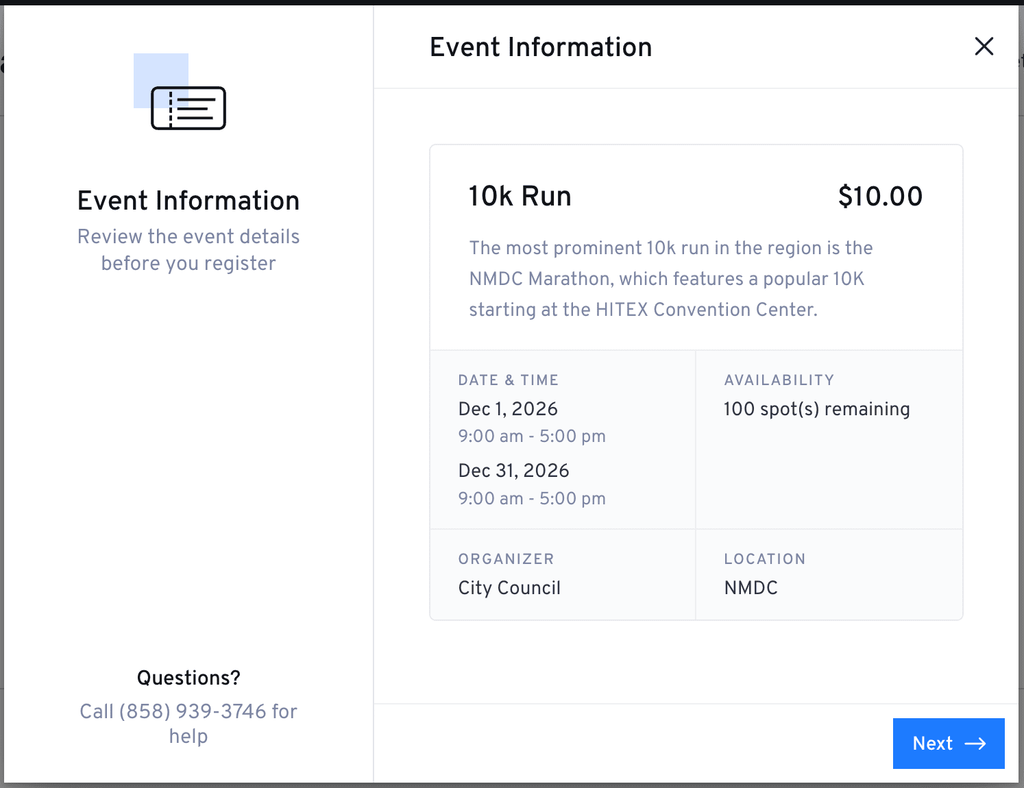
When a customer clicks the registration button (from either the events list or a standalone button), LatePoint opens the Event registration flow.
Unlike a regular appointment booking, the customer does not need to select:
- Service
- Agent
- Location
- Appointment date
- Appointment time
Instead, the customer sees the information for the selected Event and selects the required number of tickets (or, with Ticket Types enabled, the quantity per ticket type, then continues through the normal LatePoint customer-details and payment process.
We don't respond to the article feedback, we use it to improve our support content.