
- How to Display Tax-Inclusive Prices in LatePoint
- Bundled Services
- Managing Bookings With The New Shopping Cart
- Set custom start date for the calendar on your booking form
- How to make Phone Number a required field?
- How to Show Only Services or Only Bundles in a Booking Form
- How to Set Base Fee for Group Bookings
- How to Show Custom Display Price for Bundles
- Add booking form directly on a page
- Redirect to a custom “Thank you” page after booking is complete.
- Add custom content before or after booking steps
- Customize Book Button Appearance
- Add preselected Agent, Service or Location on Book Appointment Button or Form
- How to change time slot style on the calendar?
- Custom CSS for changing colors
- Booking Form Editor
- Specify which services, agents and locations will be available on a booking form
- How to pick specific categories to be displayed on the booking form
- How to show only services from specific category
- Set custom fonts for the booking form
- How to setup Facebook Pixel
- How to Disable the Messaging Functionality in LatePoint
- How to upgrade to Version 5?
- How to Update to Version 5.1.0
- Which addons are part of a PRO bundle in version 5?
- How to deactivate my license from a website I no longer use.
- Redirect to a custom “Thank you” page after booking is complete.
- How to add a link to terms of service checkbox custom field
- Edit content of the left panel section
- How to enable self hosted Google Calendar setup?
- How does LatePoint send emails?
- How to enable debug log?
- Add to Calendar link is not working
- Getting “One of the plugins is invalid” error when installing add-ons
- Error: unexpected ‘int’, expecting function…
- Service categories not showing during booking process
- Error: Cannot read properties of null (reading: verifyBuyer)
- WordPress Users still can’t login, even when “Use WordPress users as customers” option is checked
- New service is being created when trying to update existing service.
- Auto-sync of events from Google Calendar is not working
Events Overview and Getting Started
Events functionality allows you to create and manage events that customers can register for.
Unlike regular LatePoint appointments, where customers select a service, agent, date, and time, Events are predefined occurrences with their own schedule, capacity, pricing, and registration settings.
Event vs. Regular Appointment
Events and regular appointments use different booking flows.
- Regular appointment: Service > Agent > Date > Time > Customer > Payment
- Event: Event > Tickets > Customer > Payment
Events are therefore useful for predefined activities such as:
- Workshops
- Classes
- Seminars
- Conferences
- Group events
- Online sessions
- Multi-day events
Enable Events
Events are not enabled by default. Before creating or managing events, you need to enable the Events functionality.
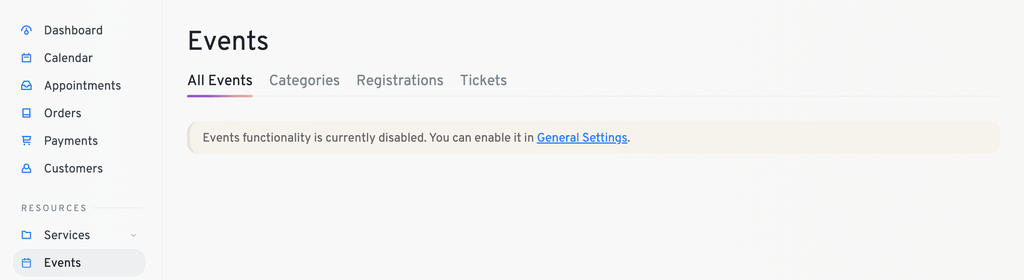
Navigate to LatePoint > Settings > General > Events
Enable Events Functionality
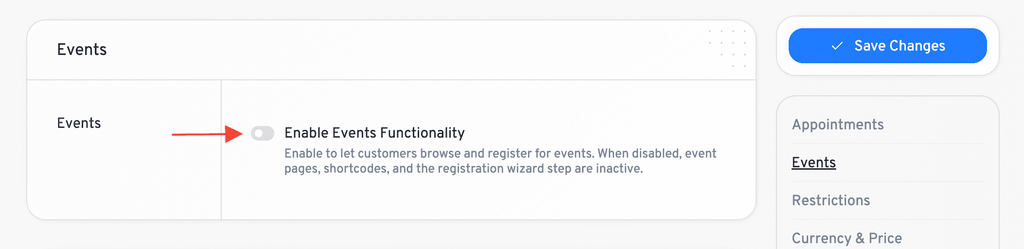
Once enabled, additional options become available (provided by LatePoint Pro):
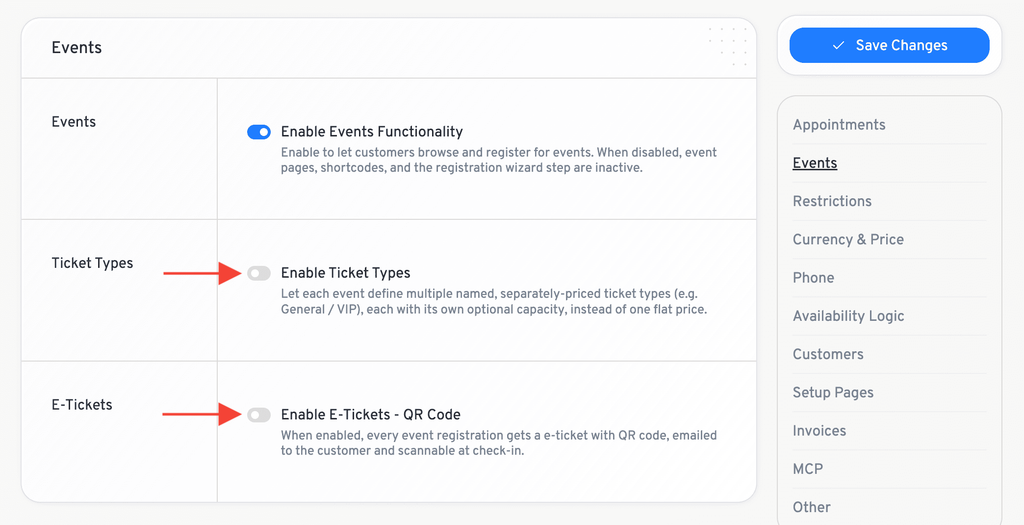
- Enable Ticket Types : Allows you to create multiple ticket types with different prices and optional capacities.
- Enable E-Tickets – QR Code : Generates E-Tickets with QR codes for event registrations, which can be emailed to customers and used for check-in.
Ticket Types and E-Tickets are optional and can be enabled based on the event requirements.
Create an Event
Navigate to LatePoint > Events > All Events > New Event
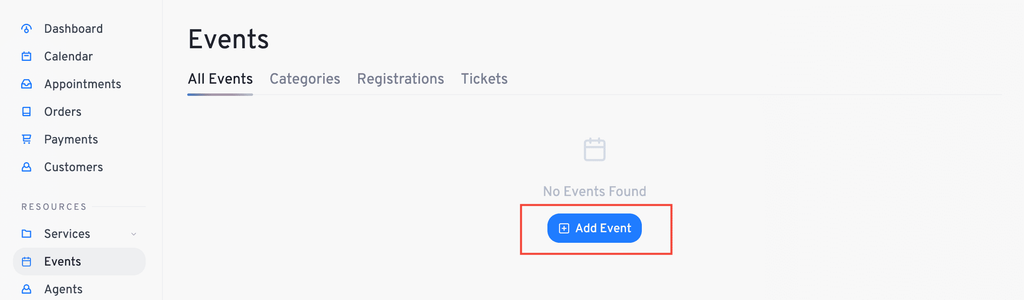
Enter the basic information for your event.
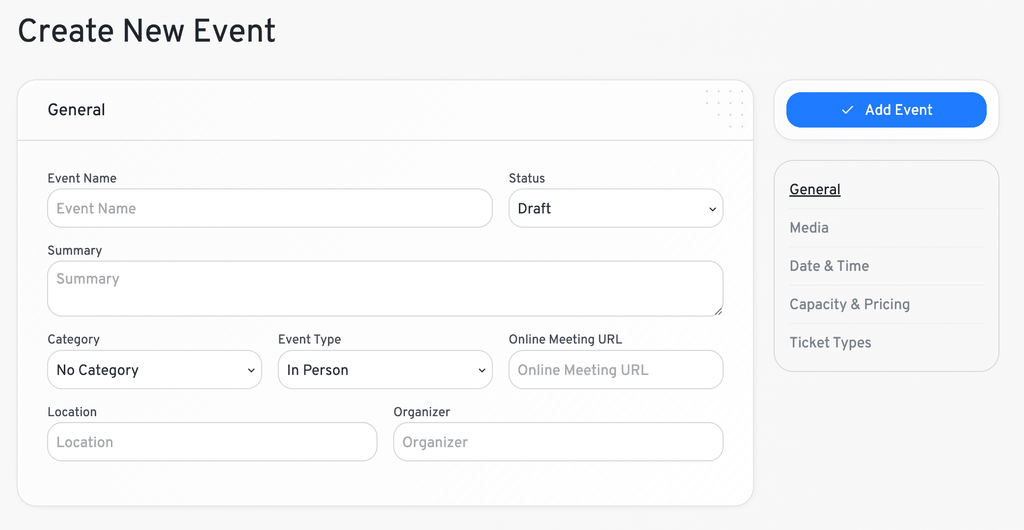
- Event Name: Enter the name that customers will see. For example: Summer Photography Workshop
- Event Type: Select the type of event, In Person or Online. For an online event, you can provide the meeting URL. For an in-person event, you can provide the event location.
- Summary: Add a short description of the event. This information can be displayed to customers when they view the event.
- Category: You can optionally assign the event to an Event Category. Categories can be useful when displaying a specific group of events on your website (see “Managing Event Categories” below).
- Location: For an in-person event, enter the location where the event will take place (a free-text field, not linked to a saved Location record).
- Organizer: Enter the name of the event organizer (also a free-text field).
- Event Image: You can add an image for the event. The event image can be displayed when using the Events list shortcode.
Add an Event Schedule
An Event can have one or more date and time ranges.
For example, you can create an event with:
- September 15, 9:00 AM – 5:00 PM
- September 16, 9:00 AM – 5:00 PM
- September 17, 9:00 AM – 1:00 PM
This allows you to create multi-day events as well as events with different schedules on different days.
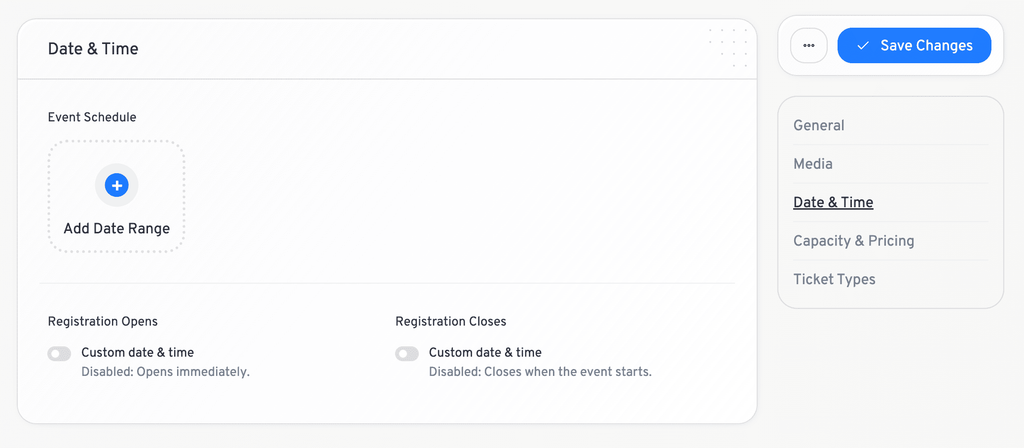
You can add multiple schedule entries to the same Event.
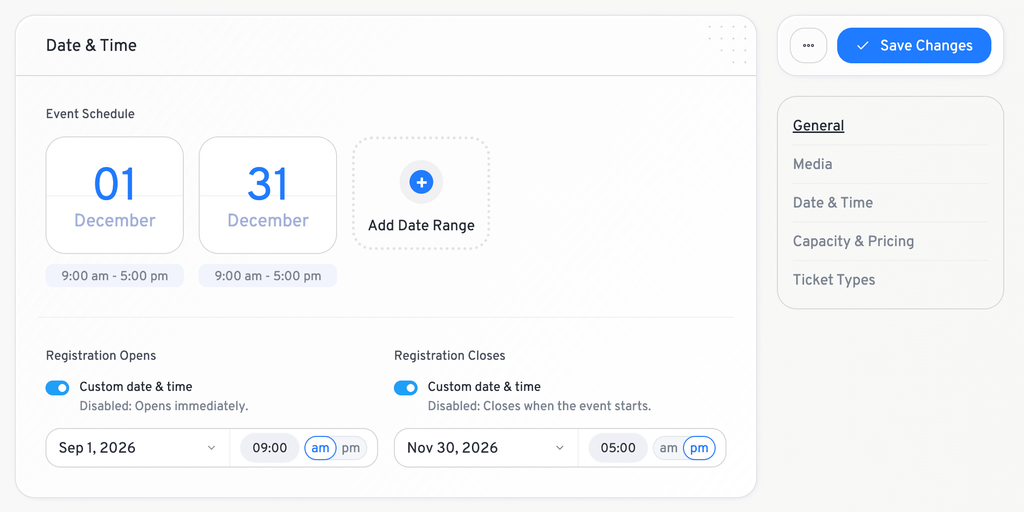
The Event’s overall start and end dates are automatically determined from its schedule.
Set Registration Dates
You can control when customers are allowed to register.
- Registration Opens: You can allow registration to open immediately or specify a date and time. For example: September 1, 2026 at 9:00 AM. Customers cannot register before the configured opening time.

- Registration Closes: You can allow registration to remain open until the event starts or specify a custom closing date and time. For example: September 14, 2026 at 11:59 PM. After the registration closing time, customers will no longer be able to register.
Set Event Capacity
You can optionally limit the number of attendees who can register.
For example: Capacity: 50
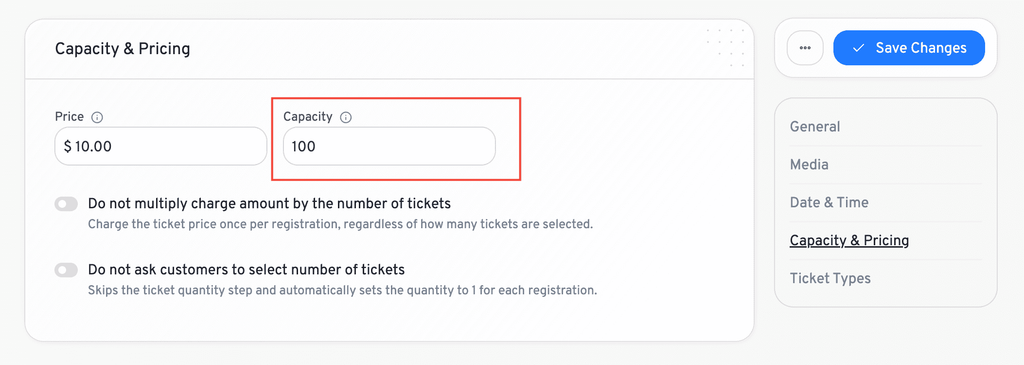
As customers register, the available capacity is reduced.
Cancelled registrations do not count toward the event capacity.
If no capacity limit is configured, the event can accept an unlimited number of registrations.
Set Event Price
Enter the price for the event.
For example: $25 per ticket
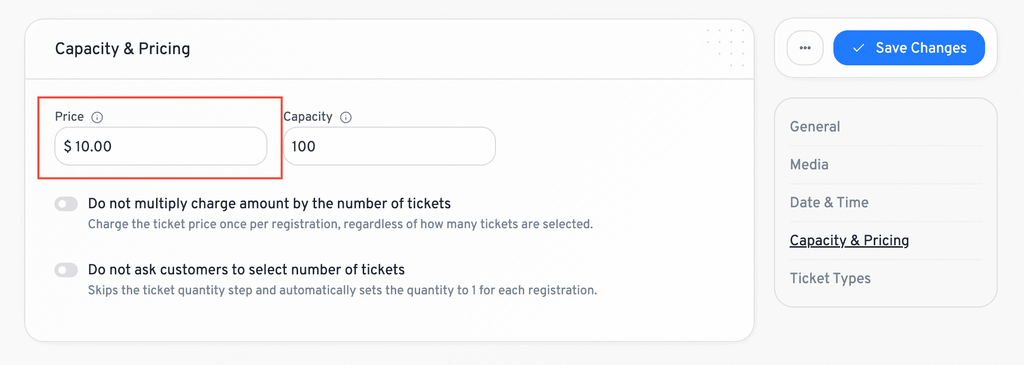
By default, the event price is multiplied by the number of tickets selected by the customer.
For example: $25 × 3 tickets = $75
You can disable this behavior using: Do not multiply charge amount by the number of tickets
When enabled, the event price is charged once regardless of the number of tickets selected.
For example: $25 × 3 tickets = $25
Publish the Event
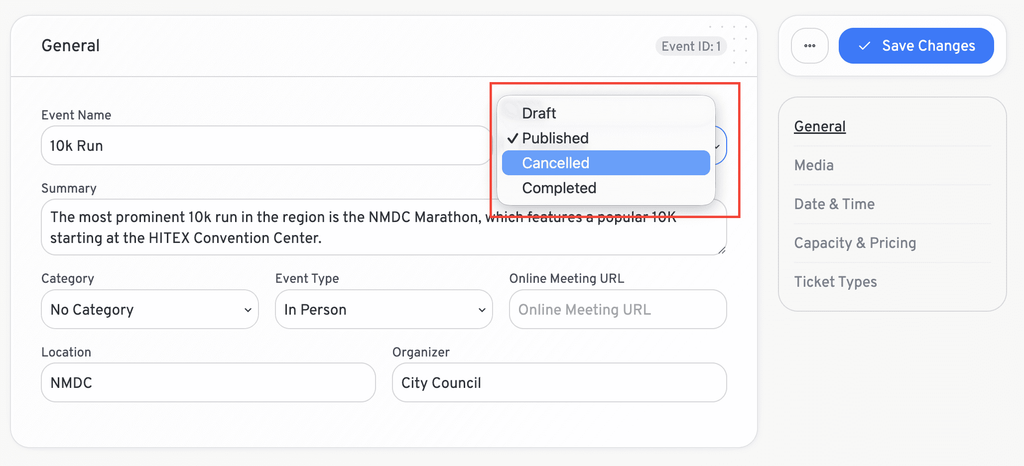
Events have different statuses:
- Draft
- Published
- Cancelled
- Completed
Only Published events can be displayed to customers and accept registrations.
Use Draft when you are still preparing an event.
Use Cancelled when the event has been cancelled.
Use Completed when the event has finished.
We don't respond to the article feedback, we use it to improve our support content.